
The ubiquitous half square triangle block. (Often called in HST.) They’re just about unavoidable in quilting, but many do avoid them! There are so many methods for making them and I could easily write a post just on all those methods, but often the reason a quilter would avoid an HST is because you go to all the effort of making them, and then they easily end up wonky and points get lost. It’s really discouraging to do a lot of work for a result that doesn’t look like you wanted! So today I’m going to show you the most consistent way to get accurate, beautiful half square triangles: sizing.
All you need are some HSTs, a cutting board, a rotary cutter, and an acrylic ruler.
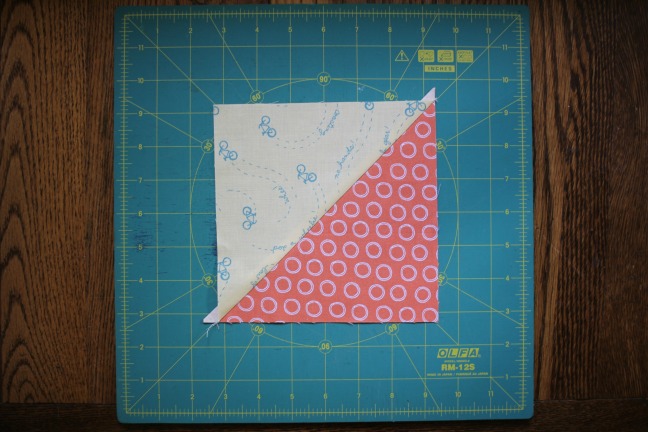
Unless a pattern already included instructions to “size” your HST, make your HST bigger than the dimensions given in the pattern. An eighth to a quarter of an inch should be plenty of extra. For instance, a lot of patterns make HST by marking the center diagonal across a square, sewing a quarter inch seam on both sides of the line and cutting that apart to make two HST. The measurements for these squares end in the size of the finished block plus 7/8″ which I always round up to make a whole inch. So for this 6″ finished block, I cut a 7″ square instead of a 6 7/8″ square.
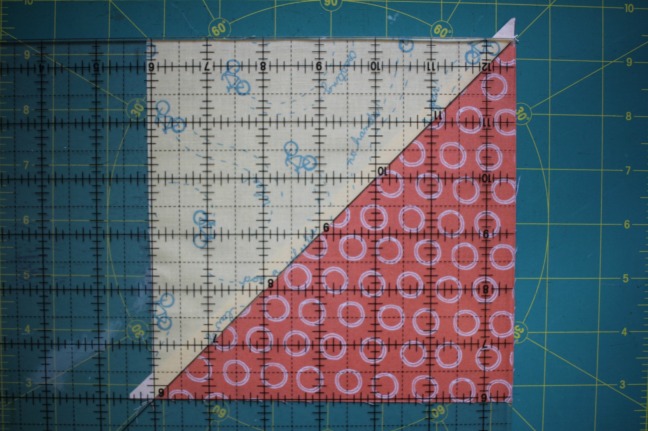
Place your ruler over the HST so that the diagonal line of the HST matches a 45° angle, and adjust until the whole block fits within the size of the unfinished block with some hanging out all sides as shown. I’m using an Olfa Frosted 12.5″ ruler, and it’s my go-to for sizing because of that diagonal line and great visibility with no slipping. (Not sponsored, I just love the Frosted line so much and am always surprised more people don’t use them.) If your ruler doesn’t have a 45° line to the corner like mine, notice that the inch intersections also line up, and align to that. Aligning the diagonal to the 45° line is what makes for perfect points later.
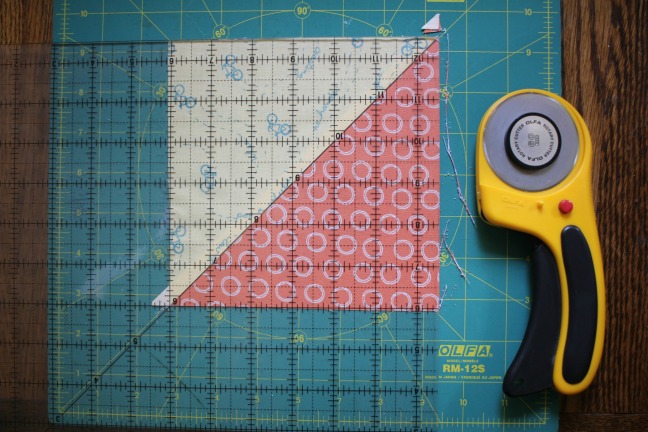
Trim the first side, and the top if you feel confident in your cutting skills. If you’re only comfortable trimming one side at a time, turn the HST now to trim the side opposite your first cut, lining up the 45° angle once again.
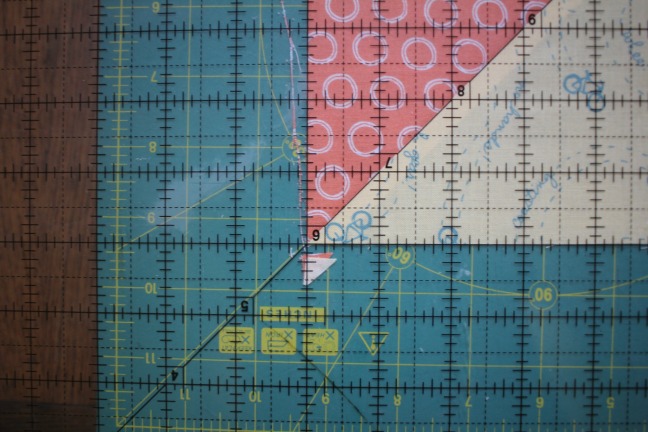
Line up the ruler to the trimmed sides of the HST. If you trimmed the side and top, your HST will look like my picture. If you trimmed the left and right sides, turn to now trim the top and line up the diagonal again. When you trim the bottom, your HST will resemble this picture.
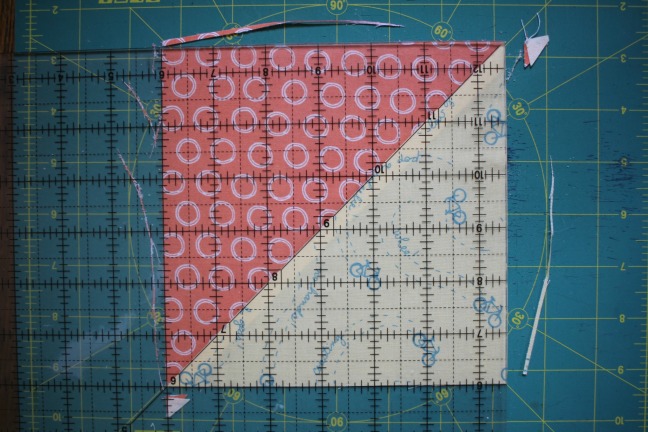
The HST is all trimmed! A perfect 6.5″ square for my 6″ finished block.
The picture in the header of this post is a closeup of the stack of 68 HST I need to press and size. Far from the most I’ve done in one go, but still a little daunting when I look at it! More than anything though, I’m impatient to get through them, because they’re for a quilt I’m designing just for y’all! Be sure to check out our Instagram for more sneak-peeks and and behind-the-scenes.
Happy creating!
Emily
