It never fails. Just about every summer, one of the Lynn & Rosie team says, “I know this is last minute, but so-and-so are in the delivery room. Could we make them a baby quilt by tomorrow?” I’m a sucker for a baby quilt and a challenge, so I always say yes. But I also always immediately start hearing this song on a loop until the quilt is done.
Look, ideally, we’d all plan these things ahead of time, make a little note in our day planners of who’s having a baby when and set aside a weekend every month or so to get those baby quilts done, but that’s not always what happens. In case you’re like me, here are some tips and tricks for making beautiful baby quilts as fast as possible.
Pre-tip Discussion: Fire-Safe Quilts
I like to make baby quilts that are fire-safe, which means they have no polyester or other man-made fibers that would melt and cause burns if wrapped around a child during a fire. Does that mean I’ve managed to make each baby quilt fire-safe? No. Often I’ve had to consider cost or simply use what I had on hand in that moment for expediency. In those instances, I always make sure the parents understand the quilt is not fire-safe. I get that this is a somewhat macabre consideration for a topic as usually fun as quilting, but these are the realities of responsible gift-making. Okay, on to the fun stuff!
1. Be Prepared
I know, I know. The whole point is this was an unexpected project! Well, let’s take a good hard look at ourselves with this one and acknowledge that if we’ve gotten into this situation once, we can easily get into the same situation again if we don’t take precautions. The two most important things to have prepared are battings and backings. Most crib quilts are 36″x52″ and there are pre-cut battings to accommodate that size quilt. Pick up a pack! For backing, you’ll need either 1⅔ yard of 42” wide quilting cotton, or 1¼ yard of 60” wide Minky fabric. Keep a little stock of that kind of yardage in your stash. Having these on hand saves you a time-consuming trip to the fabric store.
2. Make Fabric Work for You
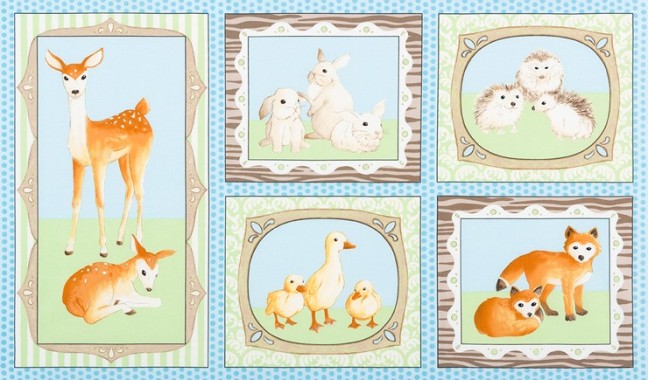
“But what about fabric for the top, Emily??” you ask. Well, that question can get overwhelming fast because there are so many good options, but I use a few principles to guide me towards a beautiful quilt without tons of planning or trips to the fabric shop. I start by trying to choose some fabrics that match the nursery colors. If I don’t know those colors or don’t have any on hand, I turn to my solids stash. Gray solids are neutral life-savers. Grab a gray solid, grab a colorful print and voila, the start of a great quilt. If you prefer to use child prints, stock up on pre-cuts of kids lines. I get into specifics of using pre-cuts in the next tip. Finally, you can pretty much never go wrong with a panel fabric.
3. Use Simple Patterns
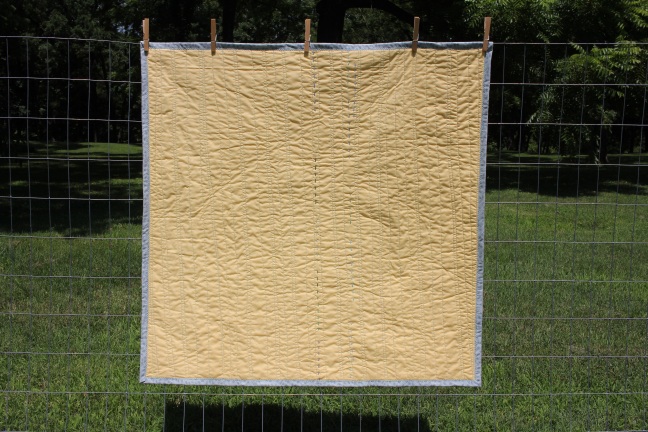
Last year, Sara and I made a baby quilt in four hours, and the top used only squares and half square triangles to make a pretty star pattern. Even that one was risky though because Sara expected us to be our usual precise piecing selves, and I had to look her dead in the eye and say, “Any points or matching seams on this quilt will be a happy accident.” Sometimes accuracy must be sacrificed for speed. I’ve utilized my precuts stash many a time: 96 charm squares, or 24 layer cake squares, or 26 jelly roll strips will all make a crib-sized quilt if just sewn together. Yesterday, I went as simple as one can and made a whole cloth quilt. I had the quilt sandwich left over from an experiment with a possible new technique that proved too difficult and time-consuming for a whole quilt. Short on time, I grabbed that sandwich and quilted it up as fast as you please. The fewer seams in a quilt, the faster the top goes together.
4. Quilt It Yourself
Speaking of quilting, this is the biggest time saver of all. Quilt that top yourself! Waiting to get in with a professional quilter is serious business, and there are tons of pros who won’t even do baby quilts because it isn’t cost effective for them. The fastest option then is to do it yourself, but that can be scary. I love piecing quilts because I can be a total perfectionist with relative ease, so the idea of managing the walking foot and messing up my top with my inexperience terrified me. Baby quilts are the perfect project to conquer the fear of quilting! They’re small enough that you won’t have to wrangle the quilt much, and if you make a mistake, so what? The quilt will keep the baby just as warm, and the gesture will mean just as much.
5. Machine Bind
This may seem like a no-duh to some quilters, but I come from a family of single-layer binders who attach the binding to the quilt with the machine, and then whip the edge down by hand. This is why I have so many quilted, but unbound quilts. When I’m up against the clock, I don’t have time for that! Plus, the baby quilts I made are meant to be used regularly, which means they’re going to be washed a bunch. I’ve taken to attaching the binding to the back of the quilt, pulling it over to the top and using a decorative stitch to finish the edge. I like that the decorative stitch adds interest and will be even stronger than a single straight stitch.

I’d be remiss if I let you go before saying the ultimate way to be prepared for a surprise baby quilt is to always have one made and waiting. I know magical, well-organized quilters who manage this regularly! But I know I’m not that person, and with these tricks, I don’t have to be. I get to enjoy an adrenaline rush, and then the long-term reward of seeing baby pictures with the quilt in action. Nothing warms my heart quite like that.
Happy creating!
Emily
